Wednesday, December 7, 2011
Christmas mantle
Monday, October 24, 2011
Making Mercury Glass

Monday, May 23, 2011
Monday morning and back to work
Friday, May 6, 2011
Pillow and cushion
I stood in Joann's with the foam and cotton batting draping and wrapping. I figured out just how much cotton batting I needed to get the "old boat cushion" feel. I finished the cushion and got in touch with her to get the cushion to her. It turned out that it wasn't for her house, but for her beach house. She was just headed there and could I meet her there. I always like to take my work to the house personally to make sure it fits.
Saturday, March 12, 2011
Dining room chairs

 But what I really did was finish all the skirts! Yah! I pretended I did in that last post but I had run out of white canvas fabric. I finally got some more and worked on them until they were done.


Thursday, March 3, 2011
Springy project


 I started by copying the pattern on freezer paper. I teach a sewing class at my kids elementary school and decided to make the pattern out of plastic. The pattern is easier for the kids to use if it is made out of plastic. I took a plastic container from the recycle and made the 2nd pattern.
Here it is placed on the fabric. I would actually recommend turning the fabric right sides together even before tracing. Just makes it a little easier when it comes time to sew. Trace and cut out.


Remeber to place the ribbon before sewing - yes I had to undo a couple of them to put the ribbon in and restich.
 Next stich around using a small seam allowance and leave the tail area open.
Turn the bird right sides out - I used a chop stick for this. The tail opening is small so a bit of patience is needed for this step and for the stuffing step which is done once the bird is turned right sides out (no picture for that part but it is pretty self explainatory)
 Finally, add some tail feathers and topstich the tail together pulling the sides out. This gives the bird a little dimension. Anything can be used for the tail feathers. Here we cut pieces of fabric with rick-rack. On another bird we used bits of ribbon. It would be fun with some feathers as well.
  So, make a bunch of birdies, hang them up and enjoy! We are supposed to get weather in the 60's this weekend - woo-hoo! The bulbs are starting to push us and it feels a little like spring.
Tuesday, March 1, 2011
Snow, snow, snow...
 I got some lovely photos of the snow before it warmed to the upper 30's,
  My lovely dried hydrangeas. I moved them from inside to get rid of them. I still like them but my family was not happy with the mess they would occasionally, okay, often make when touched - even by accident.
 I love this photo of my gnome all covered in snow next to my cute little pine tree. I tried to clean the snow off his face to make him a little more "camera ready" but at that point in the day the snow was really frozen on.
 So, to lighten my mood I spent the day inside sewing and decorating. I did a small craft project that I will reveal in full detail soon. ( sorry for the shadowy photo - I didn't get to it until this evening and was low on light)
Have a lovely day! K
Thursday, February 24, 2011
Mont Tremblant
 The day we arrived was a beautiful warm day (about 40 degrees) We visited the village and walked around a bit. We didn't do too much because we wanted to get back to the hotel to check in and the kids desperately wanted to go to the pool. Little did we know that the day we set aside for walking around the town would be so bitterly cold we wouldn't last very long. The kids enjoyed the maple taffy pops you could buy outside. Someone would pour a strip of hot maple syrup into a pan of snow and place a stick on the end. As the syrup cooled you would roll the syrup up to eat it.
  The village of Mont Tremblant was very cute. There were fire pits around and lovely decorations. The gondela in the middle photo was a walk on that would take you from the bottom up to the top of the village where the ski area started. There were tons of slopes. There is a north side and a south side and areas we never even made it to. The views at the top are beautiful.
 I usually get some pictures of the kids skiing but it really was so cold
I hardly wanted to take my hands out of my gloves.
Now the kids have a few days off but I am back to work sewing.
Happy Day! K
Monday, February 14, 2011
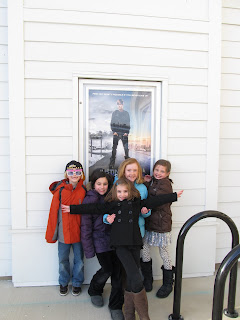
Bieber Fever


 (After)
She is still perfecting the swish over to the side.
Have a great sunny day! K
Friday, February 4, 2011
Valentine's decorations
 I made this cute heart banner a few years ago. I embroidered LOVE with my nifty sewing machine before I cut the hearts out and stitched them together. I sewed some ribbon on either end so I can tie it on. It's one of those small things that makes me smile:)
Last year I took the old candy canes, glued them together as shown and made little hearts. I think I got the idea from Family Fun magazine. Very easy. I kept mine from last year but it is easy enough to do each year. (See my favorite square Petit Fleur platter in the background?)

This one still has the ribbon to hang it, but I just leaned it up against the birdhouse one of my kids got for Christmas. At some point I will probably take the birdhouse out and let someone paint it.

Even the glassed my SIL painted for me one year look festive in the corner cabinet. Behind the glasses my goodwill bowls with the red stripes.

Finally, I took any green candy out of the mason jars. I added some red twizzlers and that is my Valentine's decoration.
It's still a week away, but Happy Valentine's Day from KH Designs


